How to Repair Windows Files using System File Checker Tool
Table of Contents
Are you dealing with damaged/corrupted or missing Windows files!
Why spend your time and money buying some random troubleshooting software when you can get all these issues fixed for free. What we are talking about is Microsoft’s another goodness, i.e. Windows System File Checker Tool. With this article, we will help you understand how to repair corrupted Windows system files using system file checker tool without much of a hassle. Before we dive into the ‘Why’ and ‘How to’ let’s first go through the basics.
What is Windows Operating System Files?
The Windows operating system is more than just the user interface you interact with. There is a diverse range of thousands of system files that are either hidden or inaccessible to you, which works in the background to keep things humming.
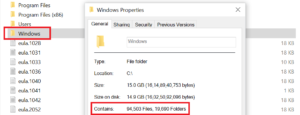
A slight change or corruption in Windows system files can immediately disrupt the normal functioning of Windows. Therefore, it is suggested not to move, edit, or delete Windows system files. Some well-known Windows protected system files are Pagefile.sys, Hiberfil.sys, Config.sys, Hal.dll, and ntdetect.com.
Here is a list explaining the reasons that cause the corruption and deletion of Windows critical system files:
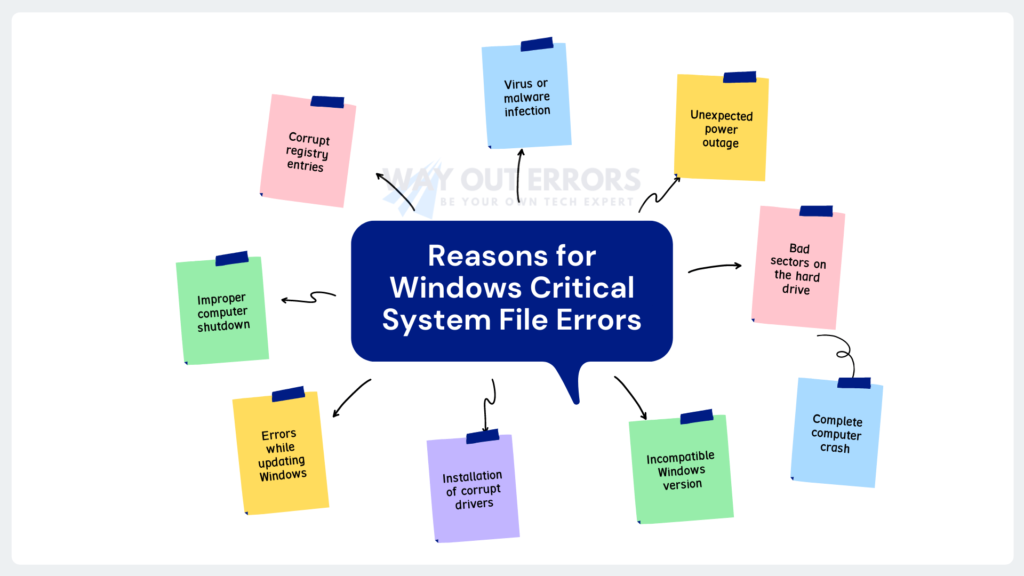
- Virus or malware infection
- Unexpected power outage
- Bad sectors on the hard drive
- Complete computer crash
- Incompatible Windows version
- Installation of corrupt drivers
- Errors while updating Windows
- Improper computer shutdown
- Corrupt registry entries
What is Windows System File Checker Tool?
Microsoft Windows offers several built-in utilities to tackle the critical challenges faced by users, one of which is Windows System File Checker Tool. Better known as “Windows SFC Repair Utility” or “Windows Repair Tool” has proved to be a real saviour for many Windows users having a hard time finding a solution for errors generated from damaged, corrupted, or missing operating system files.
Did you Know! First introduced as a built-in utility in Windows 98, Windows system file checker tool worked as a graphical user interface tool that you can use to scan and fix corrupt system files. The only drawback was that it lacks the real-time file protection feature, which was later introduced with the launch of Windows 2000 the first Windows NT based OS.

Windows system file checker is a command-line tool, designed to scan, find, and repair/replace problematic operating system files. Windows SFC utility integrates with Windows Resource Protection (WRP) that allows the tool a full access to protected OS files. Another system Windows File Protection (WFP) monitors the changes made to the critical system, file and if any adverse changes are found, it replaces the data from the backup.
Where to Find the System File Checker Tool (SFC.exe) File?
Depending on the operating system you are running, Windows SFC.exe file could be found in the following destination folders specified by the operating system:
- C:\Windows\System32\ sfc.exe
- C:\Program Files\ (x86)\ sfc.exe
- C:\Program Files\Microsoft Corporation\Windows 10 Operating System\sfc.exe

Windows SFC Command and Options
You can run Windows SFC commands only using Command Prompt (cmd) with admin-level access.
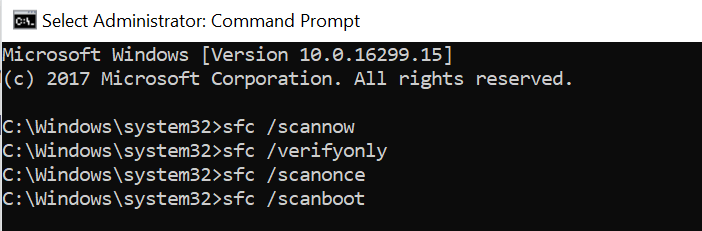
- sfc /scannow Command – This command will scan the entire operating system files and repairs them if any flaws are detected.
- sfc /verifyonly Command – If you only want to scan the system for corruptions without repairing them, then you can use this command.
- sfc /scanonce – This command is used to scan the system file only once.
- sfc /scanboot – Running this command will scan the system files whenever your system boots up.
Run sfc scannow in Windows 10
As you know running sfc scannow command in Windows 10 will scan for the damaged files and replace them with the files from the backup/cached version. If the cached version of the damaged file is not found by the repair tool, then it will prompt you to insert the Windows 10 installation disc to replace the files.
Also, note that on Windows 10 OS, sfc tool can only retrieve the files from a DVD and no other external storage device is supported like USB media storage devices or external HDD.
- Click the Cortana search box net to the Windows icon at the bottom left of the Windows.


- Type cmd and right-click the Command Prompt app from the top of the search results.
- Click Run as administrator to open the Command Prompt window.
- Hit Yes on the User Account Control prompt window.
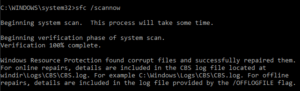
- Now type SFC /SCANNOW and press Enter.


- The scan process will take some time depending on the configuration and performance of your computer.
- Restart your system once the scan completes.
IMPORTANT: If you are using a DVD to repair, then make sure it has the latest update of your operating system. Also, note that the version number of installation disc must match the version number of the operating system installed on your PC. Here’s how to create Windows installation media disc with latest updates.
How to Repair Windows 7 using Microsoft SFC?
- Click the Windows icon and type cmd in the Search programs and files search box.
- Right-click Command Prompt application and select Run as administrator.
- If UAC warning prompt pops up, then click Yes or Continue.
- Type sfc /scannow and press Enter.
- Let the tool scan and repair the damage in the system files.
- Once the repair completes, restart the computer.
NOTE: If due to an error you are unable to boot into the Windows then to run the System file checker tool, first switch to Safe Mode> select Repair Your Computer> choose Command Prompt> press Enter. Now type command “sfc /scannow /offbootdir=c:\ /offwindir=c:\windows” and press Enter to run the Windows repair utility.
Built-in SFC Fix for Windows 8 and 8.1
- Press Windows key + C to open the search bar.
- Type Command Prompt and right-click the program.
- Select Run as administrator and enter the system password on the next prompt.
- Now type sfc /scannow and press Enter.
- Wait until the “Windows Resource Protection found corrupt files and successfully repaired them” message is displayed.

- Restart the Windows to save the changes made by the tool.
NOTE: If command prompt displays “sfc isn’t recognized” after you run the sfc /scannow command”, then make you are logged in as an administrator. You might also get this message if you are logged in as an administrator in a group managed by a super admin.
Run Windows File Repair Tool in Windows Vista
Running system file checker tool in Windows Vista is no different than running it in Windows 7. Follow the instructions mentioned in the Windows 7 section to get the task done.

Fix Damaged Files in Windows XP using SFC scannow Repair Command
- Make sure to log in as an administrator.
- Press Windows key + R to open Run dialogue box.
- Type cmd and press Enter.
- Now type the command “sfc /scannow” and press Enter.
- Let the repair tool finish scanning and repairing the files.
- It might even take an hour to get the files repaired, so be a little patient.
- Once the files are repaired, restart the Windows.
FAQ’s

 How Long does System File Checker Take to Scan and Repair Windows?
Depending upon the scannow modifier, it might take 10 minutes to an hour to complete the scan and repair action. The time taken also depends on the configuration and performance of your computer system.
How to run Windows File Integrity Checker on External Drive?
To fix corrupted files on an external hard drive using the Windows system file checker tool, you need to connect that drive to a different computer. Once connected boot into the safe mode> select Recovery> then Command Prompt and run “sfc /SCANNOW /OFFBOOTDIR=c:\ /OFFWINDIR=c:\windows” command. Make sure to replace the letter c with the letter indicating the external drive.
How to Run System File Checker at Boot Time?
To run the system file checker software at boot time you need to boot your Windows in Safe Mode and using the Command Prompt execute “sfc /scannow /offbootdir=c:\ /offwindir=c:\windows” command.
System File Checker Tool not Working. How to Fix?
There could be several reasons for system file checker not to work as you expected. One of the primary reasons is not using the admin account on Windows. Running DISM command is the most common troubleshooting for such an error:
- Press Windows key + R and type cmd in the Run dialogue box.
- Press Enter and type the administrator password if required.
- Type the command “Dism /Online /Cleanup-Image /RestoreHealth” and press Enter.
- Restart the Windows and try to run the sfc / scannow command once again.
What is the Difference Between System File Checker vs chkdsk?
Chkdsk is used to scan and fix bad sectors and file system errors on the system, whereas system file checker is a much more sophisticated tool used to repair corrupt or missing critical operating system system files.
With this article, I have tried to explain the use of the Windows system file checker tool in the simplest possible manner. However, the command line used to troubleshoot the issues can make it sound more complicated than it is. If you’re impatient and don’t want to delve deeper into the solutions, then you can always get in touch with Windows Troubleshooting Experts for immediate solutions.