How to Clean a Hard Drive on Windows 7, 8, and 10?
Table of Contents
Whether you’re a newbie or a seasoned pro, here’s your perfect guide to clean a hard drive on Windows with quick answers to the top 15 frequently asked questions.
Things starts getting out of control when your computer gets filled to the brim with useless files, app cache data, temp files, and other types of files that could be taking up extraneous space. A low on disk space computer can be quite annoying and can have issues like slow performance, constant freezing, errors installing programs, and system crashes. You might be completely unaware of the exact reason for poor Windows performance until Windows itself notifies you about it.
Windows requires timely cleanups to free up disk space and improve the disk performance of your computer’s hard drive. You might also need to deep clean your hard drive before selling your PC or giving it to someone else. Microsoft offers a plethora of viable tools and options to clean hard drives for free on Windows. Next in the article, we’ll take an in-depth look at the best way to clean your hard drive on Windows 7, 8, and 10 PCs.
Step 1: Run Windows Disk Cleanup
When it comes to erasing junk files from a hard disk, the first and the unrivalled tool is the Windows Disk Cleanup tool. The key task of the Microsoft disk clean up utility is to identify and purge the random junk files stored under different locations on your computer. Here’s how to clean hard drive space using the Windows disk cleanup utility.
- Press Windows + E to open Windows File Explorer and right-click the C Drive.
- Select Properties and in the General tab, click Disk Cleanup.


- Checkmark the data you want to get rid of, like files in the Recycle Bin, Temporary Internet Files, and Setup Log Files.


- Click OK, and the tool will wipe all the selected files.
- You can also clean the system files by selecting the Cleanup System Files option from the same window. However, deleting the system files can end up messing up the whole system. Thus it is suggested to only proceed further if you know what system files really are.
Step 2: Hunt and Remove Unused Apps
Unused or unnecessary Windows programs can clutter up your valuable disk space hurting the overall Windows performance. Uninstalling a program is super easy, and you can instantly free up tons of disk space by deleting the apps you no longer use. Follow along to figure out how to free up disk space by removing unused apps.
- Press Windows + R and type appwiz.cpl in the Run command dialogue box.
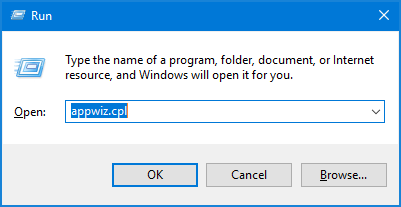

- Press Enter or click OK to get the list of every program installed on Windows.
- You can also search Uninstall a Program option in the Control Panel to get the list of installed programs.


- Now select the program that you want to eliminate and click Uninstall from the top. You can also double-click the program to get the option to uninstall.
- Follow the instructions as prompted by the uninstaller to remove the program.
Step 3: Get Rid of Gigantic Files
With continuous improvement in data quality, the size of the files is sometimes so huge that the drive space gets full far sooner than you expected. Large files can quickly eat up your drive space, and it can be a headache to search for them without the right tool or technique. Here’s a neat trick to get rid of large files that are taking up the most space on your PC.
Use Windows Search with Advanced Filters
(Size:) and (Size: >) are the two search filters that can quickly access the files of desired file size. This is how it works to clean up a slow running computer:
- Open Windows File Explorer by pressing the Windows + E.
- Type Size: 1 GB in the search bar at the top-right to search for the files which are exactly 1 GB in size.


- Type Size: > 1 GB to search for all files greater than 1 GB in size.
- Now delete the unnecessary files manually.
Step 4: Find and Delete Duplicate Files
Over time, duplicate files can built to an extent where they starts taking a significant amount of precious disk space. This could result from copying the same files to different folders or having multiple backups of the same type. Thus, it becomes of utmost importance to eliminate redundant files to clean your hard drive thoroughly. While manually searching for duplicate files can be a lot, there’s a much easier way to accomplish the same task by using tools built explicitly for the purpose.
Run Auslogics Duplicate File Finder
- Download Auslogics Duplicate File Finder to an easily accessible location.
- Run the installer file Auslogics-duplicate-file-finder-setup.exe.
- Follow the on-screen instructions to finish the installation.
- Run the app and select the Look for these file types only option after selecting the drives from the left pane.


- Click Next and choose one from Ignore files smaller than or Ignore files larger than options.


- Checkmark all three boxes on the next screen and click Next.
- Now checkmark the Permanently option and click Search.


- Once the scan completes, the app will display a list of duplicate files found.
- Now choose Select one in each group option from the Select drop-down.


- Finally, click the Delete Selected Files option to clean the hard drive on your computer.
There are many third-party tools available to find and eliminate duplicate files and you can do your own research to find one that best suits your needs.
Step 5: Clean up Hidden Junk Files
No doubt, Windows Disk Cleanup is a prominent tool to free up disk space, but it is only limited to Windows components and cannot deal with unwanted junk files created by third-party applications on Windows. To identify and delete temporary and junk files created by various apps on Windows, you will need to use third-party clean up tools. There are several cleanup tools available, and CCleaner is probably the best free option out there. Let’s show you how to clean junk files using CCleaner.
- Download and install CCleaner.
- Run the application from the Start menu or using the desktop icon.
- Click Run Cleaner in the Windows tab.


- Now move to the Applications tab and select the Run Cleaner option once again.
Till now, we have learned how to clean a hard drive on Windows using different tools and techniques. But, what if the results are not satisfactory? While deep cleaning Windows does help free up hard disk space, it does not always guarantee a feasible solution. Low-end computer systems or the ones having SSD (Solid State Drive) often have low storage capacity, and you probably need to look for other smart ways to free up a noticeable amount of hard disk space. Below given are some simple ways to free up gigabytes of disk space on your computer.
Step 6: Reduce Disk Space Used by System Restore
System Restore is a Windows feature that helps you restore Windows to an earlier point in time when it was free of any issues. By default, system restore uses 15 percent of total disk space, which is a complete waste of your system’s storage space. Adjusting the space used by system restore, you can free up a considerable amount of disk space. Here’s how to take the next step.
- Search, and open System Restore using Windows Search or from the Control Panel.


- Click Create a Restore Point and select Configure.


- Now move the slider in the Disk Space Usage section to up to 4 percent.


- Click Apply and OK to save the changes.
Step 7: Use NTFS Compression to Save Disk Space
Windows comes with an in-built feature to compress files, folders and drives on computers with the NTFS file system. NTFS compression works the same way as other compression tools, except it automatically decompress the file when you access it and compress it back when you close it. If you are running short on storage space, NTFS file compression can do wonders. However, the feature does consume system resources making it a bit slower. If your computer configuration is not powerful enough to deal with all the action in real-time, then you must consider other methods to free up disk space on your PC.
Compress Individual Files and Folders
NTFS compression is best-suited to compress certain types of files than others, and it may not be effective to compress file formats that are already compressed like program installers, zipped files, and PNG images. However, it is extremely helpful to compress document files like text, word, and excel and the ones that you hardly access.
- Right-click the file or folder that you would like to compress and select Properties.
- Hit the Advanced option under the General tab.
- Put a checkmark next to the Compress contents to save disk space option and click OK.
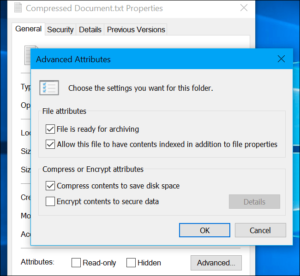

- Hit OK once again on the Properties window.
- Now select the first option if you want to apply the changes to the folder only or select the second option if you want to apply the changes to folders, sub-folders, and files.
- Finally, click OK to save the changes.
Compress an Entire Drive
When planning to compress an entire drive, the first and foremost thing to consider is the performance of your system, as NTFS compression can slow things down. If you have a computer with low specification, you must avoid compressing drives and look for other ways to free up disk space that won’t affect the performance. Also, you must never compress the C drive or the one where the operating system files are stored, as this could prove disastrous for your PC. However, if you have a latest PC with decent configuration, you can follow the instructions below to compress an entire drive.
- Open My Computer and right-click the drive that you want to compress.
- Select Properties and select the Compress this drive to save disk space option under the General tab.


- Now click OK and choose the option as per your choice on the Confirm Attribute Changes window.
- Finally, click OK to start the compression process.
Step 8: Disable Hibernation Mode
Hibernation is a power-saving mode that enables Windows to save its current state in the physical memory and resumes the PC where you left off. Windows saves hibernation data in the hiberfil.sys file, which is saved on the hard drive. On Windows 10, Hiberfil.sys file can take anywhere from 40 percent to 100 percent of the physical memory. When the hibernation mode is activated, the data stored on the physical memory (RAM) is then compressed and saved on the computer’s hard disk.
Hiberfil.sys file can range from a few megabytes to several GBs and can eat up a lot of space on your hard drive. You can definitely delete the hibernation file to reclaim valuable disk space and the only drawback is that you won’t be able to use hibernation mode on Windows. Here’s how it’s done.
- Click the Windows Start button and search Command Prompt.
- Right Click the Command Prompt Desktop app and select Run as Administrator.


- Now type powercfg -h off and hit Enter.
These simple steps will disable the hibernation mode and delete the hibernation file from the file directory.
NOTE: If you later plan to enable hibernation mode, you can run powercfg -h on command using command prompt.Step 9: Migrating Data to the Cloud
Another great way to deal with low disk space is to move your data to the cloud. Cloud storage is simply a service that allows you to store your digital content on the internet, where you can get almost unlimited storage space. Keeping your data over cloud storage gives you complete freedom and flexibility to access your data on the go. There are several cloud hosting services you can explore as per your needs and financial convenience. Here is a list of the top free cloud storage services you can choose from.
Degoo – Offers 100 GB of free cloud storage
Mega – Offers 20 GB of free cloud storage
Google Drive — Offers 15GB of free cloud storage
pCloud – Offers 10 GB of free cloud storage that can be extended to 20 GB.
Dropbox – Offers 2 GB of free cloud storage
Step 10: Transfer Data to External Storage Device
You can also consider moving your data to an external hard drive if you have no room to reclaim disk space on your internal storage. External storage devices such as USB storage or an external hard disk are handy to use and allows you to move your data from one device to another. Some of the top reasons to consider an external storage device to clean the hard drive on Windows are:
- Ample storage capacity
- Portability
- Better data transfer speed
- Cost-effective
- Data safety
Top Questions about Cleaning Windows Hard Drive
How to Free up Space on C Drive?
Uninstalling unnecessary apps, removing junk files, and getting rid of data saved on the desktop and downloads folder is the quickest way to free up disk space on C drive.
Does Installing Windows 10 Completely Wipe Hard Drive?
Until you intentionally delete the partitions, you will not lose any data while installing Windows 10. However, it will wipe apps, drivers and data from the C drive, so it is suggested to backup your data before installing a new operating system.
How to Clean External Hard Drive?
To clean an external hard drive, simply plug it into the computer and delete the files you no longer require. If you want to erase all data from the hard drive completely, right-click it and select Format from the list of options.
How can I Permanently Delete Data from Hard Drive?
To permanently delete data from the hard disk, you can use the Windows Disk Management utility. Simply run the application and right-click the partition that you want to wipe. Now select the Delete Volume or Format option to get the task done.
Is it Safe to Free up Space with Ccleaner?
Ccleaner only removes the unnecessary files that are no longer in use by the operating system. These files include temporary internet files like cache and cookies, residual files left after uninstalling apps, and unwanted registry files making CCleaner entirely safe to free up disk space on your PC.
How do I Run Disk Cleanup from Command Prompt?
To run Windows Disk Cleanup using command prompt follow the instructions given below:
- Press Windows + R to open the Run command dialogue box.
- Type CMD and click OK.
- Type cleanmgr and press Enter.
- Select the drive you want to clean and click OK.
How do I Find out what’s taking up space on my Internal Storage?
If you are a Windows 10 user, it is quite convenient for you to check what exactly is eating up the precious disk space. All you need to do is go to Settings > System > Storage and select the drive you want to analyze. You can further choose the sub-categories to figure out the programs, files, and documents taking up most of the storage on your computer. For any other version of Windows, you will need an external tool like WinDirStat to see what’s taking up space on your hard drive.
Does Wiping Free Space Make Windows Faster?
When the computer’s RAM becomes full, it requires free space on the hard drive to tackle the overflow tasks. Therefore, until your hard drive is completely full, wiping up free space does not help you improve the performance of your computer.
What is the difference between a Quick Format and a Full Format?
Quick format is simply deleting the files from the drive and takes much less time than full format. When you run a full format, the system will check the drive for bad sectors and repair them if required. You can consider quick format if you plan to keep the drive and full format if giving it to someone else as it becomes much more complex to recover the files from a fully formatted drive.
Is it Safe to Clean up System Files?
Cleaning up system files suggested by the Windows Disk Cleanup utility is entirely safe. However, you must never delete system files directly from the Windows folder as it can lead to instability of the operating system and can also completely damage it.
Where to Find Disk Cleanup in Windows 10?
Here are three different ways to access Disk Cleanup Utility in Windows 10:
Method 1: Press Windows + R > Type Cleanmgr > Press Enter.
Method 2: Search CMD from Windows Search > Open Command Prompt > Type Cleanmgr > Press Enter.
Method 3: Open Control Panel > Search Disk Cleanup from the search bar > Select Free up disk space by deleting unnecessary files option.
How can I Clean my Computer for Free?
Windows offers several built-in tools and features to clean the hard drive on the computer, and there is no need for paid tools. As discussed above, you can use Windows Disk Cleanup Utility, uninstall useless apps, and get rid of gigantic and duplicate files to clean your computer for free.
How Long does it take to Clean the Hard Drive Fully?
The time to fully clean a hard drive on Windows can vary from minutes to hours, and the duration depends on various factors, including the capacity of the hard disk, amount of disk space used, type of hard drive, the file system of the drive, configuration of the system, and the method used. In general, completely cleaning a 1 TB hard drive can take up to 24 hours or more.
Is Windows Disk Cleanup Safe to use?
In general, it is safe to delete everything that Windows Disk Cleanup identifies as junk. However, it also suggests files that may be required when you plan to reset your PC or roll it back to a previous version. To avoid facing issues in the above two scenarios, you must not delete Windows ESD installation system files and Windows Update Cleanup files.
The key rule to keep your computer perform like new is to have at least 15-20 percent free disk space. On the flip side, it is also not unusual to bump up against the capacity of your hard drive or to have too little free space available. To get your computer back to its peak performance, this guide reveals various reliable methods to free up a humongous amount of disk space in a very short time. If you can’t follow the instructions given to clean a hard drive on Windows or the guide, don’t answer what you’re looking for, feel free to get in touch with one of our Tech Team Experts, and we’ll help you resolve your issues in no time so you can move on.

